 DocuAssist.AI Guide
Sign a document
When someone sends you a document to sign through DocuAssist.AI, you get an email with a link. You sign in your browser, on a computer or a phone.
Sign
- Open the document
Select the link in the email. If you have a DocuAssist.AI account, the request also appears in Tasks with a Sign button. A blue bar tells you how many fields you need to complete.
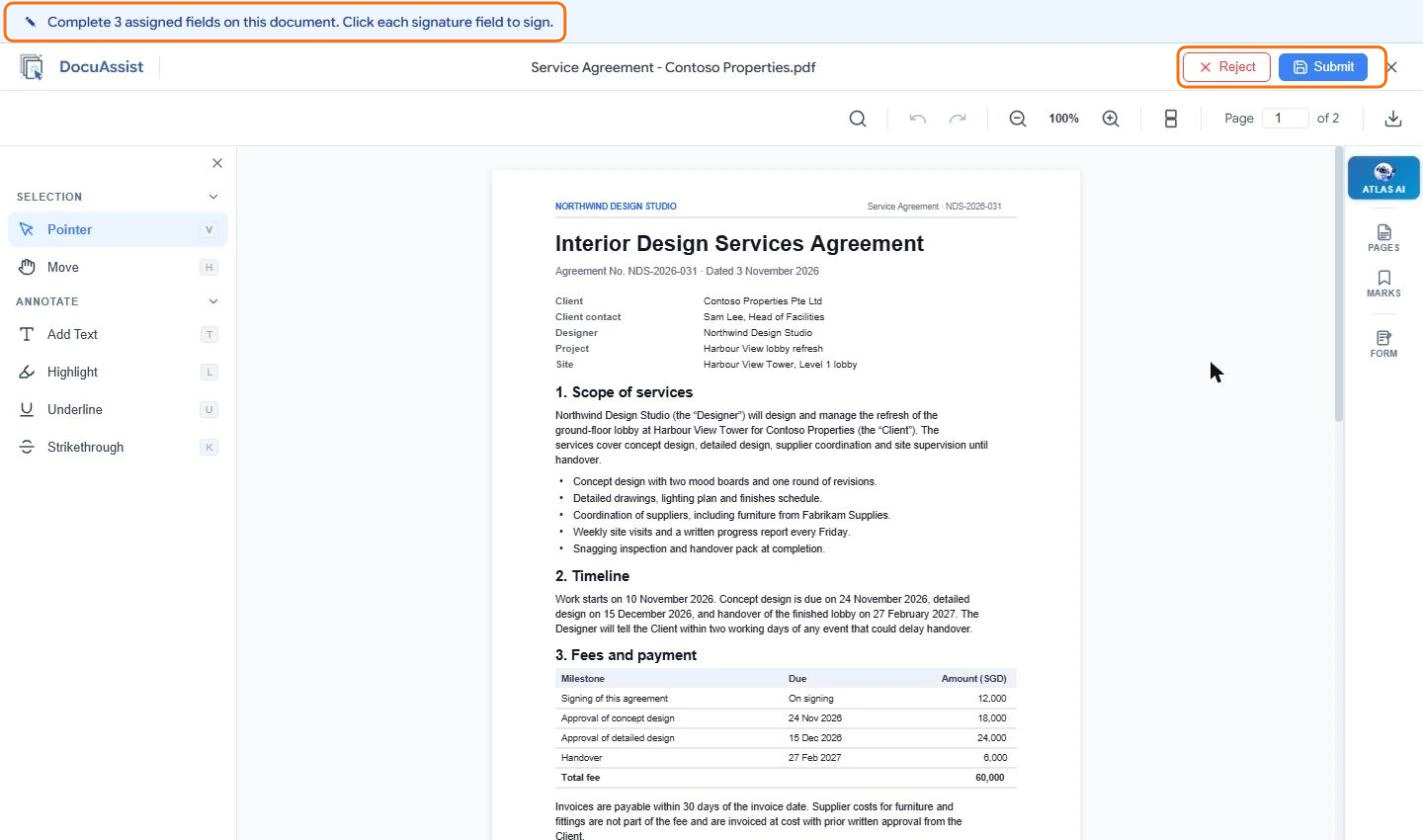
- Find your fields
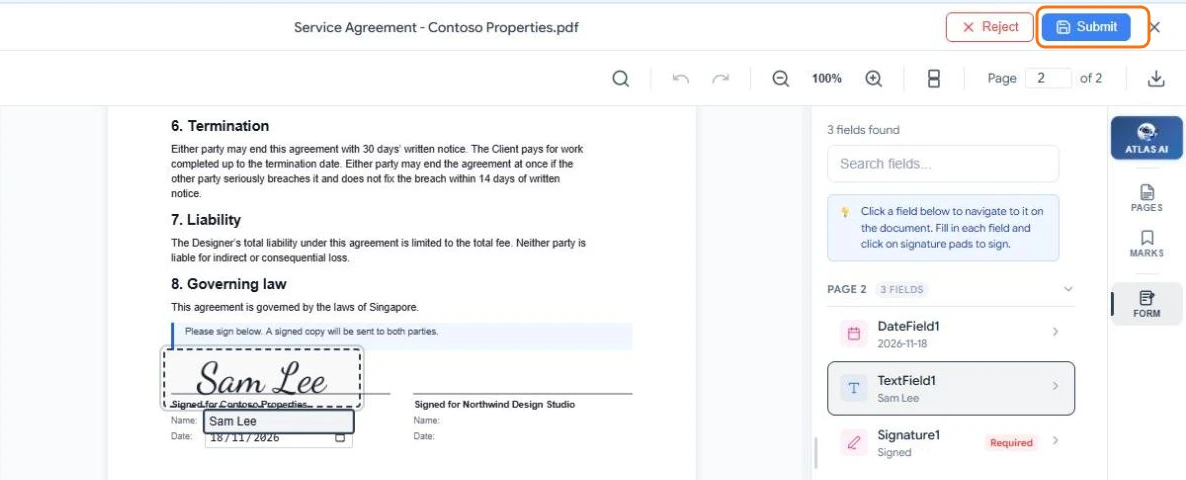
Select Form on the right to list your fields. Select a field to jump to it.
- Sign
Click the signature field. Type your name and pick a style, Draw your signature, or upload an Image of it, then select Apply. Fill in any name, text or date fields too.
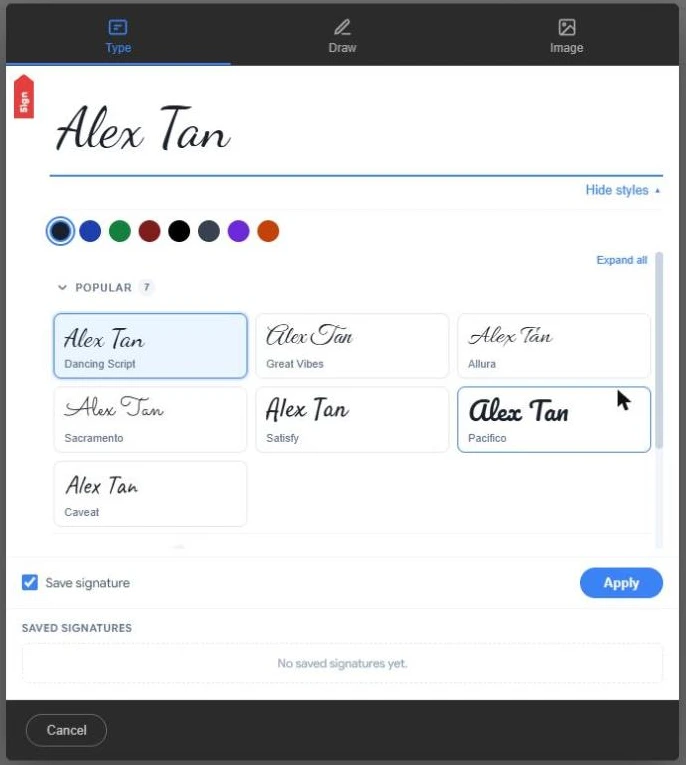
- Submit
When every field is complete, select Submit. You see a confirmation, and the sender is told.
After you sign
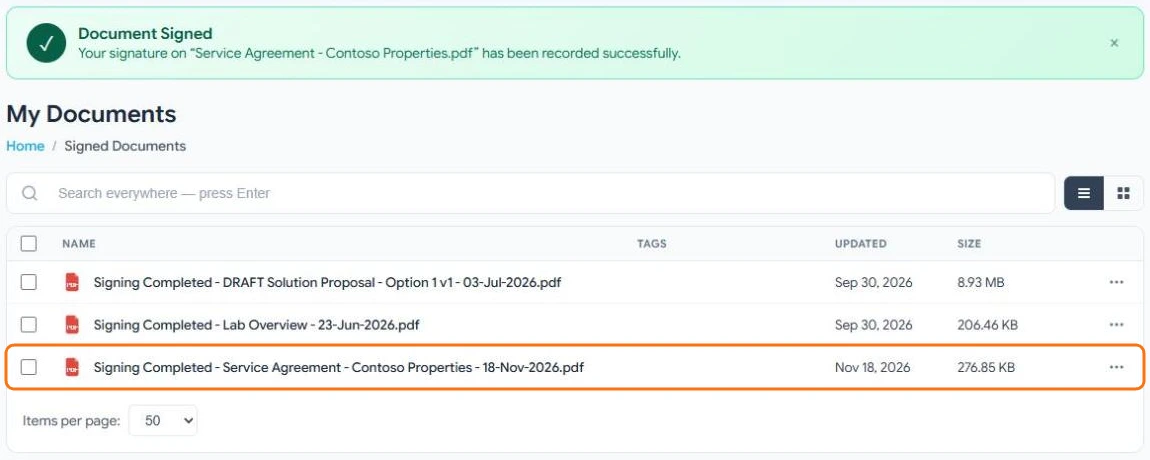
- If you have an account, a signed copy is saved in My Documents → Signed Documents in your own workspace.
- When everyone has signed, all signers and the sender get an email with the finished document.
If you do not want to sign
Select Reject and say why. The sender is told and the request stops. Ask the sender if you need changes before signing.
Tick Save signature in the signature window to reuse your signature next time. Saved signatures appear under Saved signatures.