 DocuAssist.AI Guide
Send documents for signature
Send one or more PDFs to the people who need to sign them. Each signer gets an email with a secure link, signs in the browser, and you see their progress as it happens. Nobody needs to install anything.
Before you start
- You can send PDFs only. Save Word or other files as PDF first.
- A PDF with an open password or a watermark cannot be sent for signature.
- The free Basic plan includes a few signing requests; paid plans include unlimited requests. Each request uses credits for the request and for each signer. See Credit rates.
Create a signing request
- Start a request
Select Send → For eSignatures in the menu, then New Signing Request, and select Select Documents.
- Choose the documents
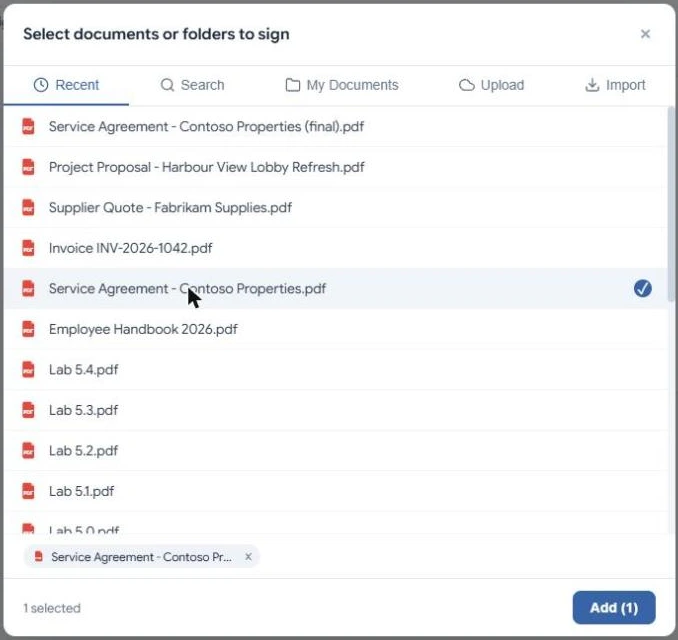
Pick one or more PDFs from Recent, Search or My Documents, or upload or import new ones. You can also pick a whole folder: every PDF inside it gets one signature from each signer. Select Add.
- Add the signers
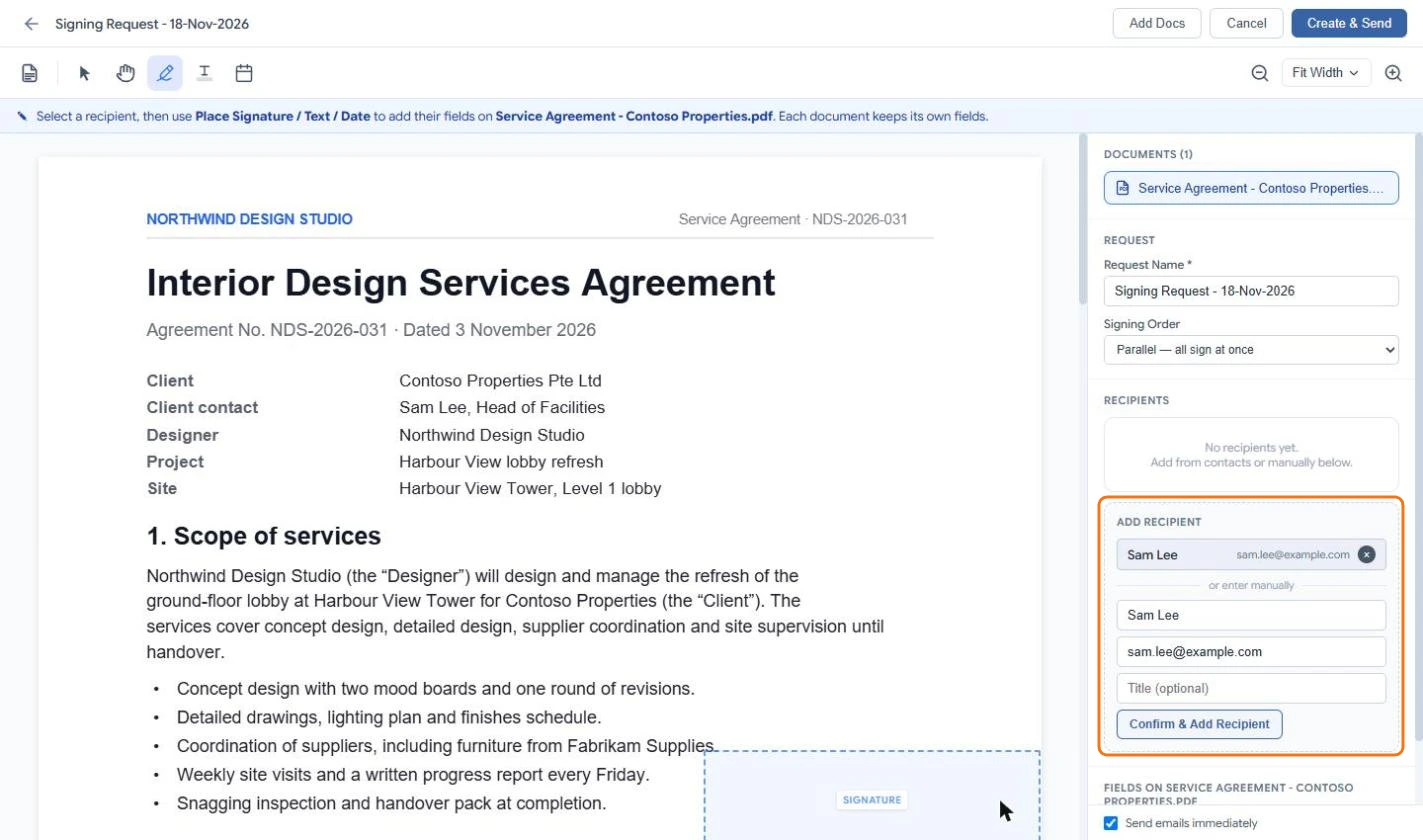
Under Add recipient, choose a contact or type a name, email and an optional title, then select Confirm & Add Recipient. Repeat for each signer. Give the request a clear Request Name.
- Choose the signing order
Under Signing Order, choose Parallel — all sign at once, or Sequential — sign in order so each signer gets the document only after the one before has signed.
- Place the fields
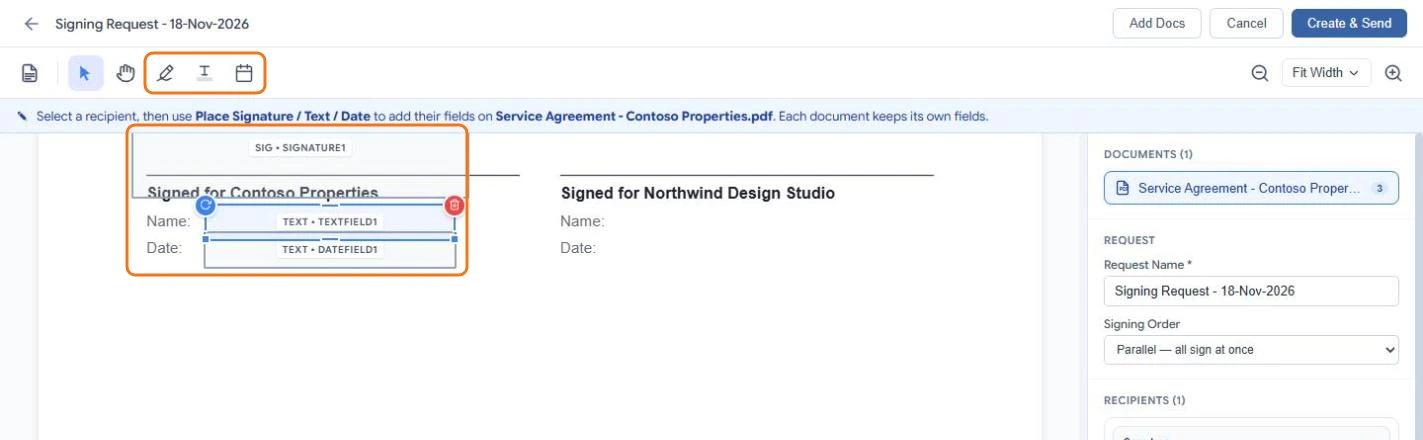
Select a signer in Recipients, then select Place Signature, Place Text or Place Date in the toolbar and click on the page where the field goes. Drag a field to move it or its edges to resize it. Each signer needs at least one field.
- Send
Keep Send emails immediately ticked and select Create & Send. Each signer gets an email with their link.
Select Add Docs to add more PDFs. Each document keeps its own fields, and a signer only signs the documents where they have a field.