 DocuAssist.AI Guide
The workflow designer
The designer shows a workflow as a flow chart: a green start (the trigger), the steps in order, and a red end. A sentence at the top says in plain words what the workflow does.
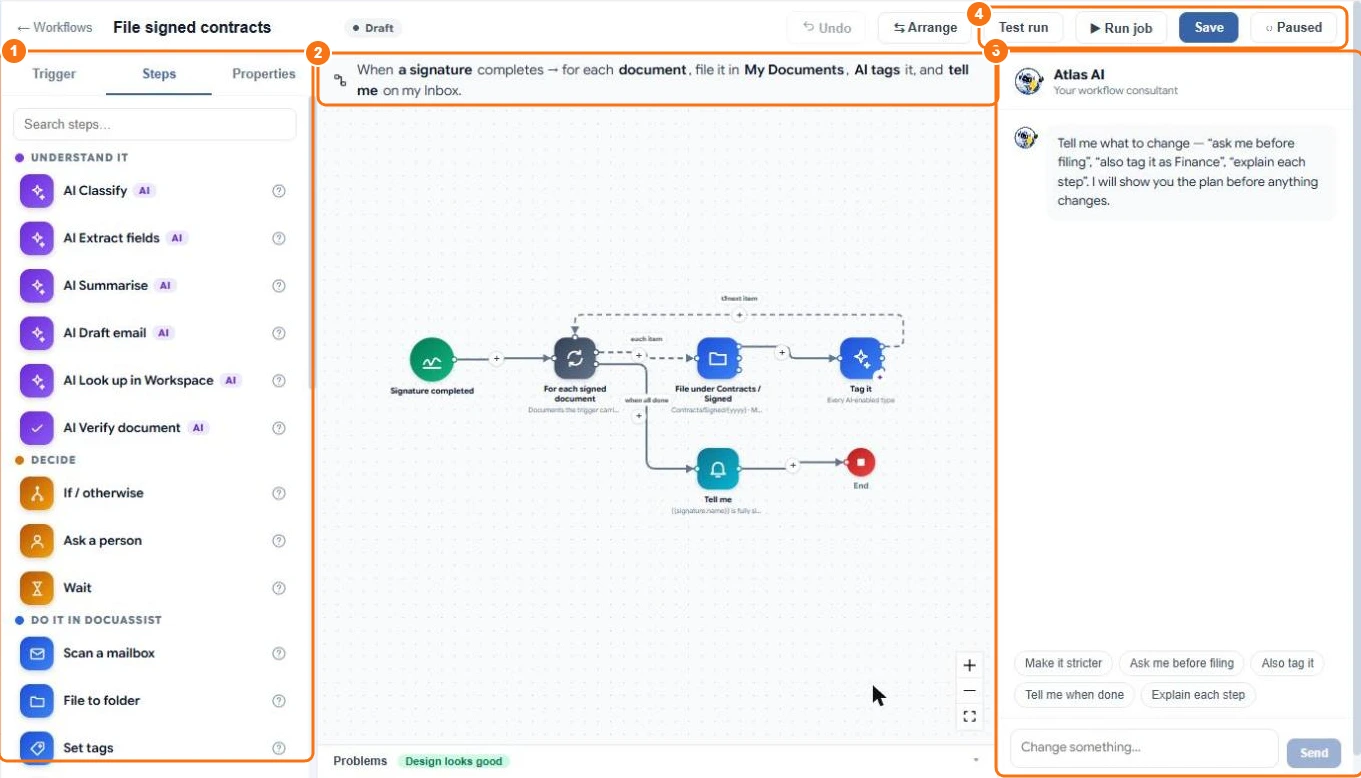
The parts of the designer
- Trigger, Steps and Properties — pick what starts the workflow, add steps from the library, and change the selected step's settings.
- The sentence — what the workflow does, in plain words. It updates as you change the workflow.
- Atlas AI — your workflow consultant. Ask it to change the workflow in plain words. See Build a workflow with Atlas AI.
- Test run, Run job, Save, and the switch that turns the workflow on or off.
Add a step
- Drag a step from the Steps library onto the canvas, or
- select the + on an arrow to insert a step there.
Select ? beside a step in the library to read what it does.
Change a step
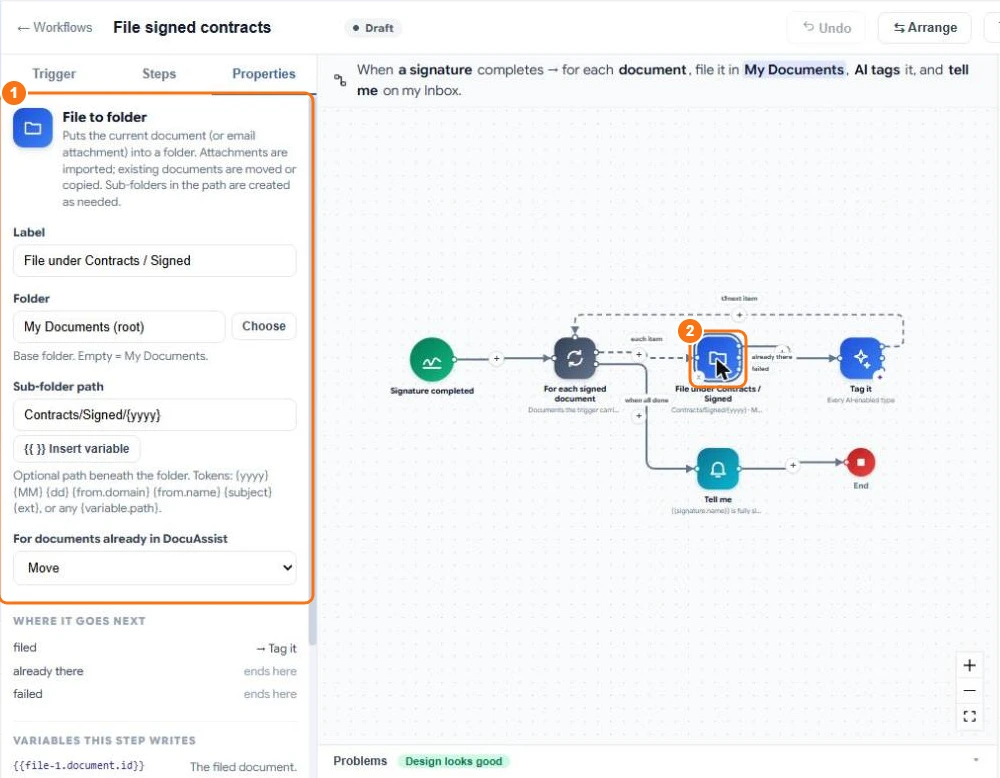
Select a step on the canvas (2). Its settings open on the Properties tab (1): for example the folder a file is put in, or the people a question goes to. Under Where it goes next, each outcome (such as filed, already there or failed) leads to the next step or ends there. Variables this step writes lists what later steps can use, such as the filed document.
Use Insert variable to put a value from an earlier step into a setting, for example the sender's name in an email subject.
Loops
A For each step repeats the steps after it for every item, such as every attachment of an email or every document of a signing request. The dashed arrow back to the loop shows where the next item starts.
Problems
The Problems bar at the bottom checks the design as you work. "Design looks good" means the workflow can be switched on. A step that needs a setting, or isn't connected, is listed with what to fix.
Save and switch it on
Select Save to keep your changes as a draft. Turn the switch on to make the workflow live. Arrange tidies the layout, and Undo reverts your last change.